March 17, 2009

Basic Pizza Dough

Filed under: Pizza — by Meredith

Basic Pizza Dough

There are few recipes that will impact your life as deeply as a good pizza dough recipe will. Once you’ve found it and mastered it, the world is your pizza. Cracker thin or thick and doughy, a little sauce or a lot, sun-dried tomatoes or thin sliced fresh, you can now make pizza to please you and only you. It will be the best tasting pizza you ever ate, even if the crust isn’t perfectly round or worse, it’s in the shape of Argentina, no worries.We like to make our dough in the stand mixer or food processor, but it can easily be mixed up by hand as well. The basic Margherita is our pizza of choice, but we also love to improvise and have lately topped with sautéed greens, sausage and Monterrey Jack or roasted red pepper sauce with caramelized onions, Kalamata olives and feta cheese.

Makes two 12-inch pizza shells

1 tablespoon granulated sugar
1 package (7 g) dried yeast
1-1/3 cups warm water 110 degrees F
1 tablespoon extra virgin olive oil
3-1/3 cups unbleached flour
1 tablespoon salt
Cornmeal for dusting

Place pizza stone or unglazed tiles on rack in oven. Preheat oven to 450ºF.
Add the sugar and yeast to the warm water and stir. Allow the water-yeast mixture to sit for about 3 or 4 minutes and when foamy on top, add the olive oil. Stir.

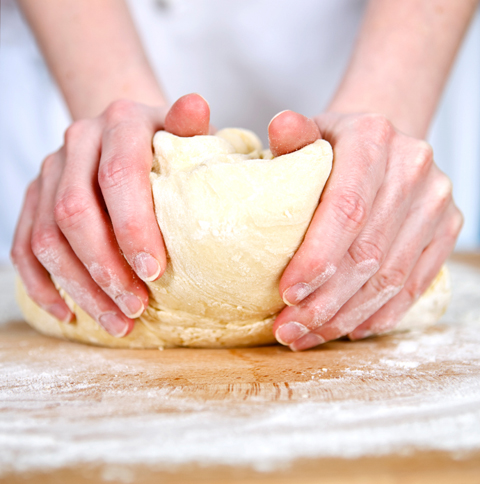
Place the flour and salt in the bowl of the stand mixer and with the paddle mix on speed 2 to blend the salt evenly into the flour. Quickly pour the yeast-water into the bowl and mix on speed 2 until the dough comes together. Switch out the paddle and with the dough hook, knead the dough until smooth and elastic and it cleans the sides of the bowl, about 3 minutes. Remove the bowl from the mixer, cover with plastic wrap or a clean dish towel and let rest for 45 minutes or until doubled in size. Deflate the dough with your hands and cut into two pieces.

With a rolling pin roll one piece of the dough out on a floured surface until about 16-inches round. Transfer the dough to a peel or cookie sheet with no sides. Open the oven door and place the front edge of the peel to the back edge of the stone. Tilt the peel slightly and pull it back toward you (kind of like the magician who pulls the tablecloth from under a table laid with dishes) effectively transferring the pizza to the stone. Close the oven and bake for about 2 minutes or until the dough has firmed up. To retrieve the pizza, just reverse the movement by sliding the peel under the partially cooked pizza, scooping it up. Top the pizza with the desired toppings and return it to the oven in the same manner. Cook the pizza for about 12 to 15 minutes or until the cheese is golden and the bottom is crispy. Transfer the pizza to a cutting board and let rest for about 3 minutes before slicing.

Repeat with second piece of dough.

Pizza possibilities
Red peppers, Kalamata olives and feta cheese

Tip: The reason we partially bake the pizza before topping it is because once the dough is on the peel, it begins to attract moisture. In the time it takes to top a pizza, the dough might stick to the peel, making a mess of trying to get it onto the hot stones. By quickly laying the dough on the peel and immediately getting it into the oven, you will be guaranteed that it won’t stick and make a mess of your oven, floor and stone.

Tip: Topping possibilities are endless. You can top pizza with almost anything, but here are a few tips: We like to use a combination of grated mozzarella, fontina, and Parmesan cheeses. For pizza sauce, you can use the basic tomato sauce recipe, but we also like to use pesto. If you are adding fresh tomatoes, make sure you have sliced them thinly, so they cook properly.

Tip: Baking pizza on a hot pizza stone or tiles gives the best result, and if you plan on making pizza once in a while the pizza stone and peel are well worth the investment. If you don’t own either of those tools though, you can still make a good pizza. Prepare the pizza directly on top of a baking sheet, place in the oven and cook for 5 minutes, or until the pizza dough has stiffened a bit. Then slide the whole thing off the baking sheet and directly onto the oven rack and continue cooking until the bottom is crisp and the top is golden and bubbly.

Make-ahead: The dough can be made a day ahead and kept in a bowl, tightly covered with plastic wrap in the refrigerator for 24 hours. The dough can also be frozen for up to 4 weeks. Thaw overnight in the refrigerator.

Rich Lobster and Roasted Corn Chowder

Filed under: Soups — by Meredith

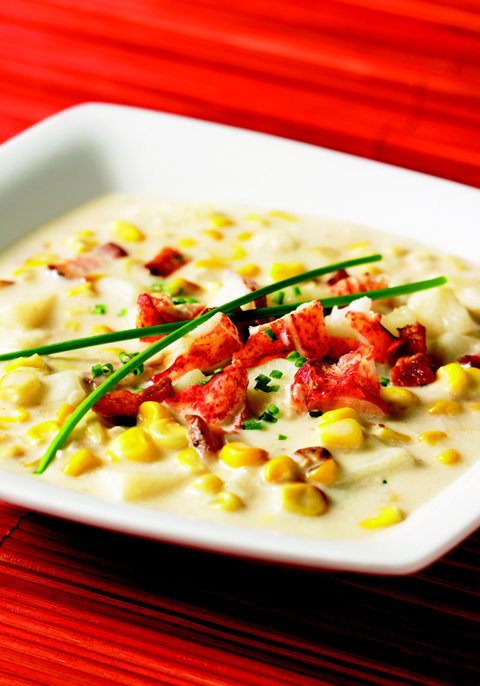
Rich Lobster and Corn Chowder

Decadent is the best word to describe this luxurious chowder. Fresh lobster is paired with sweet and toasty roasted corn for a unique and memorable taste sensation.Serves 6

3 cups fresh or frozen yellow corn kernels
1-1/2 tablespoons olive oil
1 teaspoon salt, divided
1/2 teaspoon freshly ground pepper, divided
4 bacon slices, chopped
2 cups chopped onions
Pinch cayenne pepper
1lb red-skinned potatoes, peeled, cut into 1/2-inch (1 cm) pieces
2 8 oz. (250 g) bottle clam juice, plus 3 cups chicken broth
5 cups fish stock
1-1/2 cups whipping cream
2 tablespoons unsalted butter
3 1-lb cooked lobster tails, meat removed and cut into bite-sized chunks
3 tablespoons chopped fresh chives

Preheat the oven to 425 degrees F.

Pour the corn kernels onto a large baking sheet. Drizzle with the olive oil and sprinkle with 1/2 teaspoon salt and 1/4 teaspoon pepper. Toss to coat. Roast in the oven for 10 minutes. Stir the corn and redistribute into an even layer. Continue to roast for another 10-15 minutes or until the corn is lightly, but evenly browned. Remove from oven and set aside.

Sauté bacon in large pot over medium heat until brown and crisp, about 5 minutes. Remove bacon with slotted spoon to paper towels. Pour off all but 2 tablespoons of the fat from pot. Add onions and sauté until lightly browned, about 10 minutes. Add the cayenne; and continue to cook for another minute. Add potatoes, clam juice, broth and remaining salt and pepper. Bring to a boil, lower the heat and simmer for 15 minutes. Stir in corn and whipping cream and continue to simmer 5 minutes.

Melt 2 tablespoons butter in heavy large skillet over medium heat. Add lobster; sauté until heated through, about 1 minute.

Ladle soup into heated serving bowls. Pile some of the lobster onto each serving and garnish with the bacon and chives.

Easy Chipotle Chicken Soup

Filed under: Soups — by Meredith

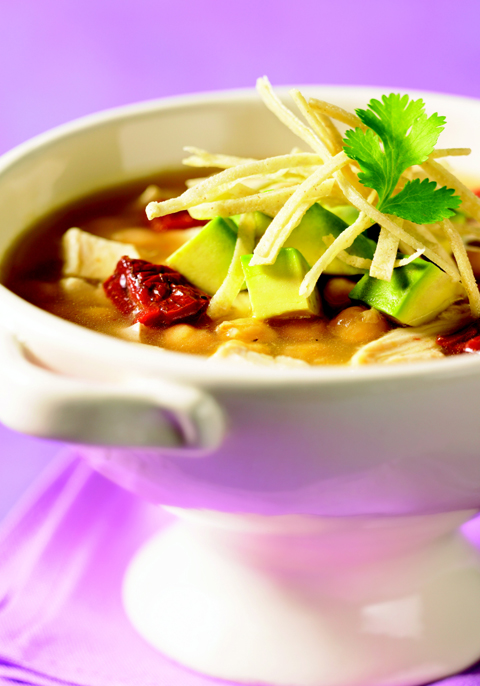
Chipotle Chicken Soup

Perfect for a busy weeknight, this fast and easy soup will warm you up in less than 20 minutes. We use store-bought rotisserie chicken and tortilla chips when time is short and tummies are growling. Chipotle chiles are jalapeños that have been smoked and then drenched in a tomatoey sauce. Look for them in a small can on the Mexican aisle at the grocery store. Freeze the leftover chipotles in an ice cube tray and then transfer to a freezer bag to use the next time (and there will be a next time) you want to spice up your taste buds.Serves 6

6 cups chicken stock
4 cloves garlic, peeled and sliced thinly
1-2 canned chipotle chiles in adobo sauce (to taste)
1/2 teaspoon freshly ground black pepper
2 15 oz (425 g) can garbanzo beans, drained
3 cups chicken, shredded into bite-size pieces
1/4 cup chopped cilantro
1 avocado, peeled, pitted and diced
Crispy Tortilla Strips
1 lime cut into wedges

Combine the chicken stock, garlic, chiles and pepper in a large pot and bring to a boil over medium high heat. Lower the heat to low and simmer for 15 minutes to allow the flavors to blend. Add the garbanzo beans and chicken and season if necessary with salt.
Divide among 6 soup bowls. Garnish with the cilantro, avocado and crispy tortilla strips and serve hot with wedges of lime on the side.

Butternut Squash Soup with Nutmeg Cream

Filed under: Uncategorized — by Carla

Butternut Squash Soup

Try to make this soup in the fall when squash is freshly picked and you will be rewarded with the creamy, sweet flavors of autumn. You know you have a fresh squash when you cut it and the flesh on the cut side instantly beads with moisture. Squash soups are so comforting with their rich, smooth texture. And if that weren’t enough, they are also a powerhouse of nutrition and loaded with antioxidants and beta carotene. The nutty flavor of freshly grated nutmeg in the unsweetened whipped cream is a lovely compliment to this sweet butternut squash soup.Serves 6

1/4 cup unsalted butter
1 2-pound butternut squash, peeled and chopped into 1-inch pieces
1 cup onion diced
1 clove garlic, peeled and minced
1 teaspoon salt
Dash freshly ground black pepper
1/2 teaspoon ground coriander
1/2 teaspoon dried thyme
5 cups chicken stock or vegetable stock
1/2 cup orange juice
1 cup whipping cream, cold, divided
Salt and freshly ground pepper
Dash ground nutmeg
Cayenne pepper to taste
1/4 teaspoon freshly grated nutmeg

Melt the butter in a large soup pot over medium-high heat. Add the squash, onion and garlic and sauté for 3 minutes. Turn the heat down to medium and add the salt, pepper, coriander and thyme and continue to sauté, stirring occasionally for another 5 minutes.

Add the chicken or vegetable stock and the orange juice and simmer the soup, covered over low heat until the squash is tender, about 30 minutes. Remove the soup from the heat and let it cool for 10 minutes. Puree the soup using an immersion blender, food processor or blender.

Add 1/2 cup of the heavy cream to the soup. Taste the soup for seasoning and make adjustments if necessary with salt, pepper, ground nutmeg and cayenne.

Add the remaining chilled 1/2 cup of the heavy cream to the bowl of a mixer and beat until soft peaks form in the cream. Add the nutmeg and combine well. Refrigerate the Nutmeg Cream if not using immediately.

Ladle the soup into heated bowls and top with a dollop of the nutmeg cream.

Fresh Lime Margaritas

Filed under: Libations — by Carla

Fresh Lime Margaritas

What’s a Cinco de Mayo fiesta without a margarita? Trick question. There’s no such thing as a fiesta without a margarita.  The true Margarita, made from fresh lime juice,  is one of our favorites drinks because 1) we love the salt on the rim, 2) the Margarita glass is fun to hold and 3) they are delicious. We prefer a shaken Margarita to the frozen slushy kind for the simple reason that there is less chance of brain freeze when you forget what you are doing (see the last sentence) and drink them too fast. Whatever you do, don’t succumb to the easy out of purchased already squeezed lime juice! The fresh lime is the only way to go, so choose limes that are heavy and thin skinned for the highest juice yield. On another note, your choice of tequila will really make a difference in the smoothness of this drink. We used 1800 Silver tequila and thought they were the best Margaritas we ever tasted. A word to the wise…these can be dangerous however, as they are so delicious that you will drink them faster than you probably should.Makes 6

3 limes, quartered lengthwise and sliced
Kosher or coarse salt

2 cups premium tequila such as 1800 Silver
1/2 cup Cointreau, Gran Marnier or triple sec
1/2 cup lime juice

Lay 8 of the lime quarters on a plate matching the circumference of the glasses you will be using for the drinks. Pour about 1/4 cup of the salt on another plate.

Gently press the rims of the glasses down onto the limes, twisting to make the rims juicy. Then lightly dip the wet rims into the salt to coat them. Place the glasses in the freezer for at least 15 minutes and up to 30 minutes to chill them off.

Combine the tequila, Cointreau and lime juice in a pitcher. Measure out 8 ounces of the mix per drink and transfer it to a shaker with about 1/2 cup crushed ice. Shake until the shaker is frosty and cold. Pour the mixture into the prepared glasses and add more of the crushed ice to the glass. Make the remaining drinks in the same manner. Garnish with some of the remaining lime quarters and serve immediately.

Green Apple Slices with Tapenade

Filed under: Appetizers — by Carla

Green Apple Slices with Tapenade

We like to think that we came up with this great duo. Tapenade is something that we always have in our refrigerators because it lasts forever and it is an instant appetizer for on the fly entertaining. It tastes great on toasted baguette slices, but we think the tartness of the apple plays off the salty herbal notes of the tapenade to delicious effect. The green, black and white colors also look great on a plain white serving tray (very minimalist.)Makes 48 pieces

1-1/2 cups Kalamata olives, pitted
3/4 cup sun-dried tomatoes packed in oil
2 garlic cloves, minced
1 teaspoon anchovy paste (more or less optional)
1/4 cup capers (preferably those packed in salt), rinsed
Zest of 1 lemon (yellow part only)
Zest of 1 orange (orange part only)
Juice of 1 lemon
1/4 cup chopped Italian parsley
1 teaspoon herbes de Provence (or 1 teaspoon dried thyme)
Freshly ground black pepper to taste
1/4 cup extra virgin olive oil

3 Granny Smith apples, halved cored and each sliced into 16 slices
2 tablespoons lemon juice

Lemon wedges and parsley leaves as garnish (optional)

Place the olives, sun dried tomatoes, garlic, anchovy paste, capers, zests, lemon juice, parsley, herbes de Provence, black pepper, and olive oil in the bowl of a food processor (or chop finely by hand and mix). Pulse a few times to incorporate and chop to desired texture (we like it chunky.)

Toss the apples with the lemon juice to keep them from browning. Spread a small mound of tapenade onto each of the sliced apples and arrange them decoratively on a platter. Garnish with lemon wedges and bunches of parsley.

Make-ahead: You may refrigerate the tapenade covered for up to 2 weeks. Bring to room temperature before serving.

Tips: It is easy to remove the pits from the olives. Simply lay the flat side of your knife
on the olive and press. The olive opens up and out pops the pit.
Capers packed in salt have a better texture than those bottled in brine. They must be rinsed thoroughly before using.
The zest from the citrus is most easily removed using a microplane, available at most cookware stores.

Honeyed Almonds

Filed under: Appetizers — by Meredith

Honeyed Almonds

OK, these addictive little salty, sweet treats could easily step over the line into the dessert category, but we found them too tempting not to share. They are great to set out in a bowl and let everyone nibble on before dinner. They’re also an interesting addition to a salad, perhaps with crumbled blue cheese or as a garnish to an ice cream sundae.Makes 2 cups

2 cups raw almonds, with skin on
1/4 cup plus 2 tablespoons sugar
2 tablespoons honey
2 tablespoons butter
3/4 teaspoon salt

Preheat oven to 400 degrees F. Place almonds in even layer on baking sheet. Roast 10 to 12 minutes. Remove from baking sheet and place in large bowl.

In saucepan combine 1/4 cup sugar, honey and butter. Bring to boil over medium heat, stirring occasionally. Once boiling, do not stir. Boil for 3 minutes. It should darken slightly as it cooks, but if it begins to go past the golden brown stage, remove it from the heat immediately to avoid burning.

Pour hot syrup over nuts. Stir well. Sprinkle with remaining sugar and salt and toss to coat. Transfer the nuts to a greased baking sheet and separate with fork. Cool completely. Store in an air tight container at room temperature for up to one week.

Make-ahead: Pecans can be prepared 5 days ahead and stored in an airtight container.

Mango Summer Rolls

Filed under: Appetizers — by Meredith

Mango Summer Rolls

Soft and sumptuous, summer rolls are just the thing when the heat is on outside and you’re making dinner inside. No need to turn on the stove, you just need hot tap water to soften the wrappers and the noodles for the filling and you’re ready to go. Mango, cucumber, cilantro and mint give this vegetarian version a refreshing, light taste. You can add cold, cooked shrimp if you want to make it more of a meal.Makes 10 rolls

3 oz vermicelli rice-stick noodles*
2 tablespoons lime juice
1 tablespoon fish sauce
1 tablespoon sugar

10 (8-inch) rice-paper rounds
60 fresh cilantro leaves
60 fresh mint leaves
2 mangos, peeled, seeded and cut into matchsticks
1 medium seedless cucumber, peeled, cored, and cut into matchsticks
4 scallions, cut thinly on the diagonal
1 cup carrot, peeled and coarsely grated

Thai Spicy Dipping Sauce (page xx)

When you are preparing to make the rolls, in a large bowl soak the noodles in hot water to cover 15 minutes, or until softened and pliable.

Drain the noodles in a colander, then rinse under cold running water and drain well again. In a large bowl, mix together the lime juice, fish sauce and sugar and mix. Add the noodles and toss to coat.

Put a double thickness of paper towel on a work surface and fill a shallow baking pan with warm water. Soak 1 rice paper round in hot water until pliable, 30 seconds to 1 minute. Carefully transfer to paper towels.

Arrange 6 mango sticks, 3 cilantro leaves, 3 mint leaves, 6 cucumber sticks across the bottom third (part nearest you) of soaked rice paper. Spread 1/4 cup noodles on top and sprinkle some of the green onion and carrot on top of noodles. Fold bottom of rice paper over filling and begin rolling up tightly, stopping at halfway point. Arrange 3 more mint leaves and 3 more cilantro leaves along crease, then fold in ends and continue rolling. Transfer summer roll, seam side down, to a plate and cover with dampened paper towels. Make 9 more rolls in same manner and serve, whole or halved diagonally, with dipping sauce.

Make-Ahead: Summer rolls can be made 4 hours ahead and chilled, covered with lightly dampened paper towels and then with plastic wrap. Let sit at room temperature for 30 minutes before serving.
Spicy Thai Dipping Sauce

Start to finish: 40 minutes
Hands on time: 10 minutes

This hot sauce is easy to make and nice to have in the refrigerator to add zing to anything from white rice to grilled fish.

4 Serrano chiles (about 2 inches long), finely chopped
1 tablespoon chopped green onion
1 garlic clove, finely minced
3 tablespoons sugar
2 tablespoons fish sauce
1/3 cup lime juice

In a small bowl, whisk together all the ingredients until the sugar has dissolved. Let the dipping sauce sit for 30 minutes before serving to allow the flavors to blend.

Make-ahead: This sauce can be made a week ahead and kept covered in the refrigerator.

Fish Tacos

Filed under: Seafood — by Meredith

Fish Tacos

Although we’ve grilled fish many times for tacos with good success, the fact is, there is no fish taco like a fried fish taco. We can’t explain how, what seems like the better half of English fish and chips landed in a taco, but we’re glad it did. The light and crispy fish is settled into a warm, soft corn tortilla, covered in seasoned cabbage and drizzled with a lime-spiked sour cream sauce. I think we’ll pass on the malt vinegar and fries. Give us a fish taco any time.Makes 12 tacos

Twelve 6-inch corn tortillas
2 -1/2 cups shredded green cabbage
2-1/2 cups shredded red cabbage
1-1/2 tablespoons fresh lime juice
1/4 teaspoon salt

1 cup all-purpose flour
2 teaspoons salt
1 cup beer (not dark)
1 pound cod fillet (or haddock, hake, tilapia) cut into 3- by 1-inch strips

Sour Cream, Lime, Cilantro Sauce (recipe follows)
Pico de Gallo (page …)

4 limes, quartered
Preheat oven to 350 degrees F.
Separate tortillas and make 2 stacks of 6. Wrap each stack in foil and heat in oven 10 minutes. In a large bowl, combine the red and green cabbage. Toss with 1-1/2 tablespoons lime juice and 1/4 teaspoon salt. Set aside.
Heat 1 inch of oil in a large heavy sauce pan) over medium heat until a deep-fat thermometer registers 360 degrees F. Stir together flour and salt in a large bowl, then stir in beer (batter will be thick). Add fish to batter and toss gently to coat. Lift each piece of fish out of batter, shaking off any excess batter. Carefully place fish into the oil and fry in batches, turning once or twice, until golden, 3 to 4 minutes. Drain on paper towels.

To Assemble: Top a tortilla with a piece of fish, sour cream sauce, salsa and cabbage. Squeeze lime over filling, fold tortillas, and eat.

Sour Cream, Lime, Cilantro Sauce

1 cup sour cream
½ cup mayonnaise
3 tablespoon finely chopped cilantro
Zest of one lime
1 tablespoon fresh lime juice
2 tablespoons milk

Combine all ingredients in a bowl and whisk until smooth. Refrigerate until ready to use.

Tarte Tatin

Filed under: Desserts — by Carla

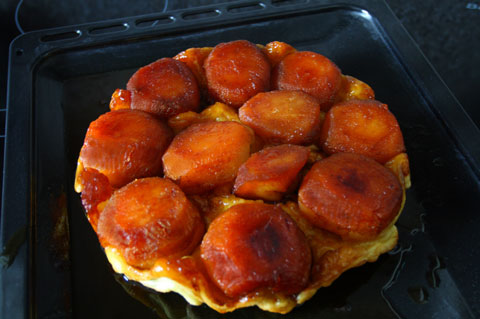
tarte-tatin

Today’s culinary history lesson (and listen up, there will be a quiz): Invented by the demoiselles Tatin over 100 years ago in their hotel-restaurant in the Lamotte Beuvron region near the Loire River, this rich upside down apple tart is a lesson in simplicity. As with many simple dishes, the quality of ingredients is tres importante. Since it isn’t possible to find French apples at the local Stop and Shop, we’ve had to experiment with local varieties. We find the Granny Smiths to be the best apples for Tarte Tatin since they keep their shape and their tartness is a nice counterpoint to the sweet buttery caramel.

Once baked, the caramelized apples are flipped so that the crispy crust is on the bottom revealing the beautiful glazed fruit. Constructed of nothing more than apples, butter and sugar in a pastry-topped skillet, this tour de force is sure to become one of your family’s favorite desserts.

Serves 10

For the pastry
1-1/2 cups unbleached all purpose flour
1/2 teaspoon salt
1/2 cup (1 stick) plus 2 tablespoons cold unsalted butter, cut into 1/2-inch cubes
1/3 cup ice water
Additional flour for rolling

16 Granny Smith apples (12 if they are large)
1/2 cup (1 stick) plus 2 tablespoons unsalted butter, softened
1-1/2 cups granulated sugar
Pinch salt

Crème fraîche or crème anglaise as garnish

To make the pastry in a stand mixer: Combine the flour, salt and butter in the bowl of a stand mixer. Using the paddle attachment, mix for 30 seconds on low speed. Turn the mixer to medium and mix until the butter is cut into the flour and only small lumps of butter remain, about 1 minute. Quickly add the ice water and when the dough begins to come together stop the machine. Remove it from the bowl and compress it into a disk with your hands. Wrap it in plastic and refrigerate for about 30 minutes to chill for easier rolling.

To make the pastry in a food processor: Combine the flour, salt and butter in the work bowl of a food processor. Pulse the mixture 10 times until the butter is cut into the flour and only small lumps of butter remain. Quickly pulse in the ice water through the feed tube (about 4 pulses) and stop the machine. The dough will not have come together. Dump the pastry onto a counter top and using the heel of your hand, smear the dough out and away from you until it forms a cohesive mass. (A pastry scraper, dough knife or bench knife makes it easy to scrape it all together.) Shape and compress the dough into a disk, wrap it in plastic and refrigerate for at least 30 minutes to chill for easier rolling.

While the dough is chilling, cut a thin slice from the bottom of each apple so that they will sit straight in the pan. Halve the apples lengthwise then core and peel them.

In a 10-or 11-inch skillet (about 3 qt.) with straight sides add the butter and heat over medium-high heat until melted. Sprinkle the sugar and salt over the butter and cook, stirring occasionally until the sugar begins to brown, about 4 minutes. Lower the heat and cook for 3 minutes after the sugar begins to brown stirring every now and then to ensure even caramelization. When the mixture becomes a deep golden caramel, remove it from the heat.

Carefully stand the apples flat side down around the outside of the pan (cut sides facing in) then fill in the center with the remaining apples so that the apples are as snug as possible. It may be necessary to cut some of the apples in half (quarters) so that they fit. Return the pan to medium-low heat and cook for about 3 minutes. The apples will begin to give off some of their liquid, thinning the hard caramel. Using a turkey baster, baste the apples with the caramel. It will be thick at first, but will thin as the apples cook. Baste for about 10 minutes and add leftover apples cut into quarters to fill in spaces that open up as the apples soften.. Remove the pan from the heat.

Preheat an oven to 400 degrees F.

To roll out the pastry: Lightly flour a work surface with about 1 tablespoon of flour. Place the unwrapped disk of dough on top of the flour and dust the top of the disk with an additional tablespoon or so of flour. Roll the dough gently but firmly, picking it up after each roll and rotating it a quarter turn from 12 o’clock to 3 o’clock. This rotation keeps the dough from sticking and also helps to keep a round shape.

Roll the dough to about 14-inches in diameter and trim the round so that it is 2-inches larger than your cooking pan. Fold the dough in half and then into a quarter and transfer it to the skillet placing the folded point in the center of the apples. Quickly open the dough and fold the sides down between the apples and the pan. Cut vent holes in the top and bake on a sheet pan with sides (to catch any drips) in the preheated oven for 25 to 30 minutes or until the pastry is brown and crisp.

Remove from the oven and let cool for at least 20 minutes before carefully inverting onto a large serving platter. Cut the tart at the table and serve warm with crème fraîche or crème anglaise.

Make-ahead: If you make the tart earlier in the day, it should be warmed in a 350 degree F. oven for about 20 minutes before serving. Turn the tart out right before service onto a serving platter.

Note: French apple pie or Tarte Tatin is so revered that there is actually a brotherhood founded to protect the dish from adaptations and promote its consumption. La Confrerie des Lichonneux de Tarte Tatin is dedicated to protect the original dish from being perverted by persons who want to put a dollop of ice cream on top of it. Their website is www.tarte-tatin.com/.

Tip: Though a simple dessert, this French apple pie is not uncomplicated. Browning the sugar and butter to the perfect color caramel is key. If you are using a dark skillet, spoon some of the caramel as it is cooking to get an idea of how dark it is. Too dark and your tart will be bitter. Too light and it will lack depth and richness.

Tip: The correct size skillet is important. We think a 10- or 11-inch skillet with straight sides works best. If you use a skillet with sloping sides (like a fry pan) the tart may not hold together when unmolded and look a bit messy on the sides but it will still taste great. Traditionally tarte tatin was made in cast iron pans. If you find an old seasoned cast iron pan with straight sides, by all means use it. It will cook your tarte tatin to perfection. Le Creuset also makes special tarte tatin pans that can be found in some cookware stores.

Older Posts »