I love to cook just for me.
Not normal at all, I know, but when my husband is away for the night, I often turn on the Coltrane, Krall, Ray Charles, mix a cocktail and improvise dinner with whatever is in the house. The other night I had a yen for pasta. Whether using a hand cranker or the electric KitchenAid -roller, making pasta is a lot of fun. You take a little blob of dough and turn it into something ethereal…a magical silk purse from a sow’s ear sort of thing.
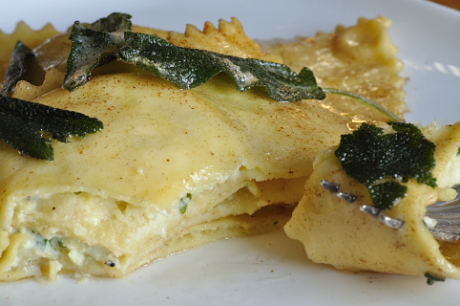
After a rummage in the frig, I found a smidge of ricotta left over from last week’s lasagna, goat cheese, a wedge of Parmesan, mozzarella, and a bunch of sage leaves. Of course, it all added up to cheese stuffed ravioli with fried sage and browned butter. I flipped on the music (added Big Night to the mix), lit the fire and had a great time making and eating those tender cheese stuffed bites. The salty/creamy, stuffed ravioli juxtaposed with the browned butter and fried sage is one of my favorite flavor contrasts. I’m not crazy about the taste of raw sage, but when fried to a crisp in butter it morphs into something delish. The bonus is that the butter takes on the flavor of the sage turning it into a nutty, sagey sauce. The dish paired beautifully with a breezy little Sauvignon Blanc from Spain appropriately named Las Brisas.
Every time I roll pasta I’m reminded of the creative time spent with those Playdoh factories we had as children. Oh, the hours spent extruding shapes and molding imprints with brightly colored blue, red, yellow and white Playdoh. And here I am, still having a great time playing with dough. Only now the reward is dinner. For one.

Kitchen Counter Point: It’s definitely no fun for your hard earned ravioli to come undone in the cooking water. That’s why it’s important that you push the air from the inside edge of the filling to the outer edge of the pasta when sealing it. If air remains inside the sealed pasta, it expands when heated and pops open your pasta, so this is a pretty important tip. Also be sure to seal the ravioli, pressing down on the seams to make sure that they don’t come unhinged. I like to use a fork. Finally, cook the ravioli at a gentle boil. That way the force of the bubbles is less likely to burst those little pillows apart.
Serves 1 (plus leftovers for lunch the next day)
Pasta (or use purchased fresh pasta sheets)
Makes about 1-1/4 pound, serves 4-6 (extra can be frozen for another day)
2-3/4 cups all purpose flour, plus more if necessary
4 large eggs
1 teaspoon salt
Filling
1/3 cup ricotta cheese
1/4 cup mozzarella cheese, grated
3 tablespoons goat cheese
2 tablespoons Parmesan, grated
1 egg yolk
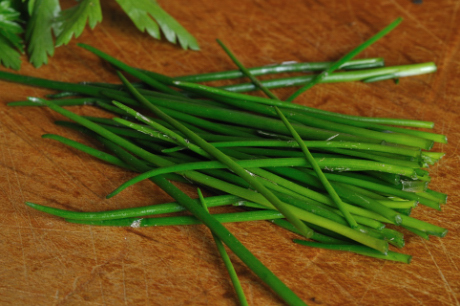
1 teaspoon fresh chives (if they’ve come up in your garden yet), minced
1 teaspoon parsley (ditto), minced
Pinch salt
Pinch freshly ground black pepper
Pinch cayenne
Pinch nutmeg
4 tablespoons unsalted butter
6 large sage leaves
Salt and freshly ground black pepper to taste
Extra Parmesan cheese
Place flour and salt in the bowl of a food processor. Add the eggs and pulse several times until clumps of moist dough form. Turn the dough out onto lightly floured work surface. Divide it into 4 piles, gather each into ball and knead until smooth, sprinkling lightly with flour if sticking, about 3 minutes. Wrap in plastic. Let the dough rest at room temperature at least 20 minutes.
While the dough rests, combine the cheeses, egg, herbs, salt, pepper, cayenne and nutmeg and taste for seasoning.
Rolling dough into sheets:
Freeze two of the dough balls for another time. Set the pasta machine to the widest setting. Working with one piece at a time, and keeping the other covered, flatten the dough into a rectangle and run ut through the machine. Fold it in thirds crosswise, as if you were folding a letter. Dust the outside lightly with flour and putting the open end through first, run through roller again. Repeat this process on the widest setting until the dough is smooth and elastic. It may take 3 or 4 times. This is a continuation of the kneading process and gives the dough a chance to absorb more flour if it is too sticky. Then continue to roll through the narrower settings (one time through each setting, without folding). Dust lightly with flour as needed to keep it from sticking, until the pasta sheet is the desired thickness (if hand cranking, roll all the way to the thinnest setting and if using the KitchenAid roller roll it down to #5). Place the sheet of dough on a lightly floured work surface. Repeat with the remaining pasta piece. If the pasta tears at any time during the rolling process, just fold it in half, dust the outside with flour on both sides and run it through the same setting one more time.
Bring 4 quarts of water to a gentle boil.
Fill a small bowl with water and a pastry brush. Dust the counter lightly with flour. Lay out the long sheet of pasta, fold it in half and make a mark on the dough at the halfway point. Open the strip of dough out again and brush half the surface very lightly with water. Drop small spoonfuls of your filling on the damp pasta sheet, about 2 inches apart. Fold the other half over the filling, making sure all the filling is covered and at least a 1-inch border remains around the edges. Using your index finger, gently press out the air pockets around each mound of filling. Use a sharp knife, pizza cutter or ravioli cutter to cut each ravioli into squares and press down on the edges with the tines of a fork to make a tight seal. Dust a sheet pan with flour to prevent the pasta from sticking and lay them out on the sheet making sure not to let them touch. Repeat with remaining dough sheet and filling.
Heat a large sauté pan over medium heat and add the butter. When it is sizzling hot, add the sage leaves, brown them on both sides and then transfer them to a plate. It should take about 2 or 3 minutes. The butter should be browned and full of sagey flavor. Remove the pan from the heat making sure that it doesn’t burn.
Add 1 tablespoon of salt to the boiling water. Drop the ravioli into the boiling water and stir, making sure that they don’t stick on the bottom. Cook the ravioli at a bare simmer until just tender, about 4 minutes. Drain into a colander or scoop from the water with a slotted spoon and add the ravioli to the warm browned butter. Toss gently to coat. Pour the ravioli out onto a heated plate and top with the fried sage leaves, a sprinkle of salt and freshly ground black pepper. Garnish with extra grated Parmesan cheese if desired


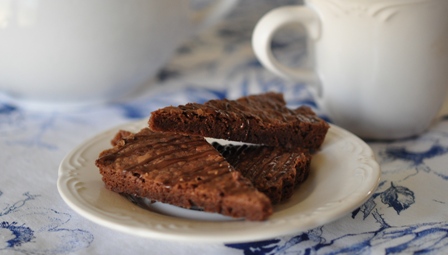
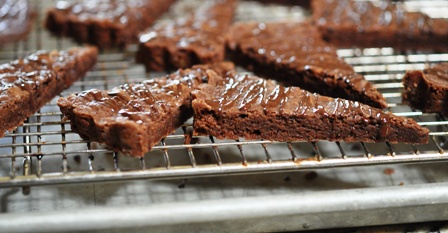 Kitchen Counter Point- Although these cookies are great rolled out and cut into rounds, for a different twist, I also like to roll out the dough slightly and then press it into a small (I use a 7-1/2 inch), fluted tart pan with a removable bottom. It takes about 20 minutes to cook and I cut the cookies into wedges with a serrated knife when they are still slightly warm. You will need two tart pans for this recipe, or just keep one half of the dough chilled while the other is baking and then repeat the process. Make sure to thoroughly cool down your pan though before pressing the second batch of dough in. You don’t want to melt it before it gets in the oven.