February 10, 2011

Quince pound cake with Ginger

Filed under: Desserts — by Carla

quince-pound-cak_186

I don’t miss summer, but I do miss summer fruit. It’s not that I don’t appreciate the mounds of apples and pears in all their glorious colors and shapes, but the winter is long and options for seasonal fruit forward desserts can become kind of ho hum. The solution: If you look hard, chances are there’s a bin of exotic, local fruit at your market just waiting to be discovered. It’s green and round with a funny little stem end that protrudes like an outie belly button.


quince-pound-cak_189

No, it isn’t a hybrid of a Granny Smith apple and a Bartlett pear. It’s a quince.

Though they’ve been cultivated for more than 4,000 years we Americans as a whole have not explored their many options. To be fair, I think it’s because most of us don’t know what to do with them. They haven’t been popular since the last century and must be cooked for an hour to be palatable, but to me, that’s part of their appeal. I’d like to make a case for the quince so I’ll begin with the fruit’s more obvious virtues.
     • Quinces are beautiful and kind of sexy. There are few fruits as beautiful nestled in a bowl or basket. They are usually a shade of Martha Stewart green when you buy them, but after sitting for a week or so, they turn yellow and ripe. I’ve had a bowl of quince on my kitchen counter for weeks and have enjoyed looking at them longer than I’d ever have enjoyed a flower arrangement.
     • Quinces have an interesting history. The ancient Romans considered the quince a symbol of love. When given to one’s intended, the fruit signified commitment or a form of engagement ring. It’s true that it does take commitment to bring out the quince’s finer qualities, but isn’t that true of most relationships? Go ahead and think about that for a minute.
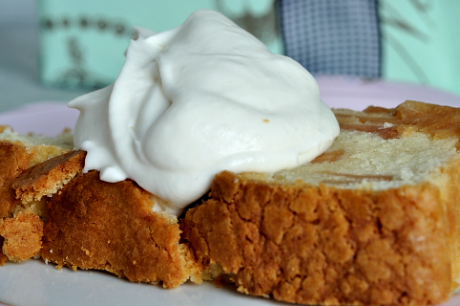
     • Quinces are an unexpected ingredient, which makes them cool. After all, it’s interesting to play with an unfamiliar fruit and explore the many ways to use it. How fun to share the discovery and give others the chance to taste an unfamiliar food for the first time. When was the last time you had a slice of tender quince pound cake with quince syrup flavored whipped cream? Case closed.

So there you go. Think beyond the ubiquitous apple and pear. Pick up a few quinces and arrange them in a bowl to beautify your kitchen counter for a week or so. Hand one to your significant other as a sign of your love and then make this buttery, gingery, tart quince pound cake for your loved one’s first taste of quince. It probably won’t be their last.

quince-pound-cak_1871Kitchen Counter Point: Ginger makes its way into this cake in two ways. First the half and half is infused with fresh ginger. The longer the ginger sits in the hot liquid, the more flavor will transfer. Go ahead and get that process going after you’ve started cooking the quince. They’ll be done at the same time. If you can, let it rest while the quince cools for extra flavor. The second ginger infusion is with ground ginger which is sifted with the flour. If your ground ginger has been languishing in your spice rack for the last few years, think about replacing it with a fresh bottle for the best flavor.

Makes one 5 by 9-inch loaf

2 large quince
1 cup apple cider
1 cup sugar
1/4 cup honey
1/4 cup water
1 tablespoon lemon juice
15 peppercorns
1 cinnamon stick

1/2 cup half and half
2 thumb sized knobs of gingerroot, peeled and thinly sliced

2 cups all-purpose flour
1/2 teaspoon ground ginger
1/4 teaspoon salt
1/4 teaspoon baking powder
1 cup (2 sticks) unsalted butter, softened
1 1/2 cups sugar
3 large eggs
1 teaspoon vanilla
Zest of 1 lemon

1 cup heavy whipping cream

Peel, quarter and core the quinces and slice them very thinly.

In a medium saucepan combine the quince, cider, sugar, honey, water, lemon juice, peppercorns and cinnamon stick and bring to a simmer over medium-high heat. Reduce the heat and simmer the mixture for 1 hour or until the quince is rosy and tender. Let cool in the syrup and then strain the quince, reserving the syrup.

Scald the half and half and ginger in a small saucepan over medium heat. Remove from the heat, cover and let the ginger flavor the milk for at least 30 minutes. Strain the ginger from the milk and throw it away.

Preheat oven to 350º

Butter a 5 by 9-inch loaf pan, and line on the long sides with a sheet of parchment that extends up over the top edges of the pan (you’ll use it to lift the cake from the pan after it’s baked) and butter and flour the parchment.

Sift together the flour, ground ginger, salt and baking powder.

Cream the butter and sugar on medium speed until light and fluffy. Add the eggs, one at a time and beat until completely blended. Add the vanilla and zest.

Add the flour and milk in 6 additions and beat on medium speed until fluffy. Spread the batter evenly into the pan and bake on the center rack in the preheated oven for 30 minutes. Lower the heat to 325ºF and bake for 1 hour 15 minutes or until a wooden skewer inserted in the center of the cake is removed with crumbs adhering. Cool the cake on a wire rack until completely cooled. Lift it from the pan with the parchment paper and wrap it in plastic if not using right away.

When ready to serve, beat the whipping cream with 1/4 cup of the quince syrup. Serve the cake, sliced with the quince whipping cream.

October 12, 2010

Whopper Brownies

Filed under: Desserts — by Carla

whopper-brownies_144

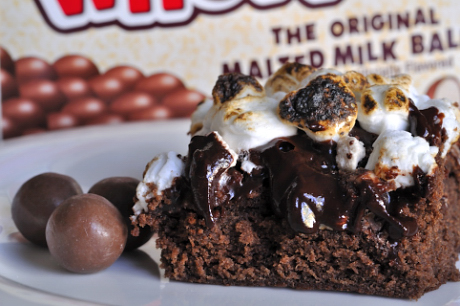
Last week I made the Chocolate Malt Cake from Momofuku Milk Bar for my mother-in-law’s birthday. While it might have been a little more sophisticated than the usual birthday cake, it was worth the effort.  You should have seen the delight on her face when we fired the topping of mini marshmallows and lit the candles with my husband’s propane torch. No matter how old you are, fire and chocolate  are always exciting.

The cake was fabulous and fun, pleasing adults and kids alike.  I liked it so much that I got to thinking about developing an easier to make brownie clone of the cake incorporating the crunchy malted crumbs, malty fudge sauce and of course the toasted marshmallows on top of a fudgy brownie base. Let’s just say I was successful in creating what might best be described as chocolate turpitude on a plate.

Because you’re bad…very bad to eat these brownies. In the 90’s they’d have the words “death by” written in front of them. Personally,  I find turpitude preferable to death. It offers so many more options. But, I digress.

Unlike the cake whose towering three layers were impossible to cut into anything but Fred Flintstone sized slices, these brownies are easily cut into two-bite-sized bricks of deliciousness. I especially like the shy hint of salt, compliments of the un-dissolved flakes of kosher salt in the batter. The brownie base is buttery, fudgy and chewy. Not the least bit cakey. In other words, it’s perfect. The malted fudge sauce gets its flavor from one of my favorite childhood treats… Ovaltine. Christina Tosi, the pastry chef who originated the cake recipe, gets points for creativity here. The sauce is delicious, firms up just right and takes but a minute to make. But that is just the beginning of her malty genius. She used Ovaltine in the crunchy malted “milk crumbs” as well. I think this component is one of the most important to the success of the cake and though a bit weird, this baked mixture of dried milk, flour, sugar, butter, Ovaltine and white chocolate really made the cake sing.  I understand why she developed those little malted crumbs.  But really. Can’t we just use the more easily procured Whoppers, crushed, to top our version? I think so.

Intrigued yet? We’re just getting to the pyro part if the recipe. If you don’t have a propane torch, just set the marshmallow topped brownies under the broiler for a minute to toast them up, but the torch is infinitely more fun because you get to hold the fire.

And who doesn’t love to play with fire? Remember the fun of toasting marshmallows on a stick when you were a kid? I liked to make mine really brown, just a moment before they ignited into flames. And the bonfire itself with its hot licking flames and how you smelled the smoke when you sniffed your clothes and hair the next day. And what kid didn’t love Whoppers? Those irresistible chocolate covered malted milk balls that you might have chomped on while watching a movie like The Good, the Bad, and the Ugly back in the summer of 1966?


But, I digress yet again. I guess these fudgy brownies with their Whoppers, Ovaltine fudge sauce and toasted marshmallows take me back to a simpler, less complicated time. I can’t guarantee that they’ll make you feel like kids again, but why not give them a try? It might help you to remember toasting marshmallows in the backyard and chowing down on a whole carton of Whoppers or eating a ridiculous (in a good way) brownie and how it tasted so good that you ate another.

 Chocolate turpitude be damned. Pass me the brownies.

brownie_168

Kitchen Counter Point:  A propane torch is a handy thing to have around the house. I love using it to brown the sugar on top of crème brulée, to char peppers, to brown meringue (as in lemon meringue pie) and even sometimes to caramelize or brown high sugar fruits such as pineapple or berries when topped with a sabayon. It really puts the heat right where you want it. Not like the broiler which has a tendency to over heat the dessert that lies below the surface.  Ace Hardware sells a great little gadget that screws to the top of the tank. All you have to do is turn it on, push a button and the fire is ignited. Beware the wimpy “kitchen torches” sold in cookware shops. They don’t have the mojo to get the job done. 

Makes about 16 good sized brownies
Brownie base
1 cup all purpose unbleached flour
1/2 cup cocoa
1 teaspoon baking powder
3/4 teaspoon kosher salt
1 1/2 sticks unsalted butter, room temperature
1 1/2 cups sugar
3 large eggs
1/4 cup buttermilk
1 tablespoon dark corn syrup
1 teaspoon vanilla

Malt Fudge Sauce
1/2 cup plus 2 tablespoons Ovaltine
2 oz. bittersweet chocolate, chopped
Pinch kosher salt
1/4 cup heavy whipping cream
1/4 cup dark corn syrup
2 tablespoons sugar

1 cup crushed Whoppers
3 or 4 handfuls of mini marshmallows

Preheat oven to 350ºF.

Grease a 9x 9-inch baking pan and line it with parchment paper leaving excess paper on two sides of the pan so that later, the brownies can be easily lifted out. Grease the parchment paper.

Sift together the flour, cocoa, baking powder and salt. Set aside

Combine the butter and sugar in a mixer bowl and beat on medium high speed until light and fluffy. Scrape down the sides and add the eggs, one at a time and beat until blended. Beat in the buttermilk, corn syrup and vanilla. Reduce the speed and add the dry ingredients in three additions, stopping to scrape down the sides. Beat the batter another minute on medium-high to thoroughly combine. It will be thick.

Spread the batter evenly in the prepared pan and bake in the preheated oven for 35 to 40 minutes. The center should still be a bit jiggly. Transfer to a rack and cool completely. It’s normal for the center to sink a bit on cooling.

To make the fudge sauce, combine the Ovaltine, chocolate and kosher salt in a medium bowl. Set aside. Combine the cream, corn syrup and sugar in a small saucepan and bring to a boil. Dump the Ovaltine mixture into the pan and let sit for 1 minute, then stir until smooth. (Make the sauce right before assembling or it will firm up and you’ll have to reheat it to a pourable consistency.)

Crush the Whoppers in a heavy duty plastic bag with a mallet or a hammer. Leave some crunchy chunks for texture.

To assemble the brownies, spread a thin drizzle of fudge sauce over the top of the brownies and sprinkle over the crumbled Whoppers. Drizzle over another layer of fudge sauce. If the sauce is too thick, rewarm gently over low heat. Scatter the marshmallows evenly over the top pushing them down into the sauce so that they adhere. Quickly char the marshmallows with the propane torch that’s probably in your garage. If your significant other isn’t the handy type, preheat the broiler and brown the marshmallows in the oven for about 1 minute. Cool the marshmallows. Lift the brownies from the pan and transfer them to a cutting board. Cut the brownies into bars, wiping the knife clean between cuts and serve. The brownies keep tightly sealed for 5 days but they will be gone in 2 or 3.

August 24, 2010

Meyer Lemon and Blackberry Ice

Filed under: Desserts — by Carla

blackberry-ice_134

Those lazy, hazy, crazy days of summer just keep on rolling on here in Ohio where it has been hot, hot, hot. So much for summer’s open windows with the sounds of locust,  chirping birds and children playing. We’ve reluctantly spent most of our summer nights sealed in our sterile airconditioned homes instead of sitting on the porch breathing in summer’s heady aroma of freshly watered plants, our neighbors fire pit and the few hosta lilies that the deer left for us to enjoy.  I can’t help noticing, though, that it hasn’t been so hot in Paris. Every morning I check the weather there (because that is where I’d really like to be) and see that the Parisian summer of 2010 has been cool and dry…in the 70’s and 80’s most days. Zut alors! What I wouldn’t give for a few weeks to ramble those city streets in relative seasonal comfort. This was definitely the summer for a trip to Paris.


So, for the time being I will not peruse the cool wonders of the Musée d’Orsay or the not so sizzling Rive Gauche and must make the best of being stuck in hot and humid Northeast Ohio. And though we don’t have lemon trees here from which to make lemonade, the heat here has resulted in a bumper crop of very fine berries.  Last week I figured why not tame some of that heat with a delicious fruit ice?

 blackberry-ice_1351

As luck would have it,  my grocer recently featured an abundance of locally grown, juicy blackberries. I grabbed two quarts and moved on to pick up a few other items when a basket of orangey yellow Meyer lemons came into view. We don’t usually see them here in Cleveland, so I dropped five or six into my bag, the better to make a deliciously contrasting Meyer lemon ice as well. The colors would be dramatic with the purply berry and pale lemon ices nestled in a glass and the flavors would offset each other with the lighter, breezier, not so sharp lemon and the dense, dark sweet berry.


One of the most attractive features of a summer ice is that you don’t need an ice cream freezer to make them. Just blend the ingredients together, pour the mixture into a 9x 13-inch metal pan and pop it in the freezer for 1 hour. After an hour’s freeze, just give it a scrape with the tines of a fork, freeze for another hour, repeat the process and let it firm up for another hour or overnight. The mix is sweet enough that it usually doesn’t harden into an unscoopable mass, but if it is too hard to scoop, just scrape it again with the fork to loosen it up. I usually make fruit ice a day ahead just to be sure it’s  firm, but even slushy, these fruit ices are heaven.


With a beautiful, cool dessert in the freezer I have the feeling that a shady evening on the patio might be in order. To set the mood, I’ll put on my Francophile’s music mix of Edith Piaf, Rendevous à Paris and Pink Martini. To keep things cool we’ll open a bottle of chilled Sancerre, toss together a pizza on the grill, maybe add a tomato salad and follow it up with this fruity, iced duo. It won’t be Paris, but it will be cool and delicious and we can all pretend.  


Kitchen Counter Point: Charming Meyer lemons aren’t as puckery as a regular lemon. They are thought to be a cross between a lemon and a mandarin orange and taste as if that might be true. If you can’t find them go ahead and use regular lemons, but up the sugar to 1 cup. Blueberries can stand in for the blackberries with no changes to the recipe. Another nice way to serve these ices is to pour a shot of vodka or tequila over them and serve as a cocktail of sorts. Or a boozy dessert. Both work for me.


Meyer Lemon Ice

2 cups water
3/4 cup granulated sugar
Pinch of salt
3/4 cup fresh squeezed Meyer lemon juice (about 5 lemons)

Bring water, sugar and salt to a simmer and stir until sugar is dissolved. Remove the pan from heat and add the lemon juice. Pour the mixture into a 9x 13-inch pan and let it cool to room temperature. Place it in the freezer for 1 hour. Remove the pan from the freezer and scrape the frozen edges into the center of the pan with a fork. Return it to the freezer for another hour. Scrape the ice crystals again to the center and return to the freezer for at least another hour or overnight. Scoop the ice  into small chilled bowls and serve immediately. Can be made a day ahead. If the mixture becomes too firm to scoop, just scrape it again with the tines of a fork to loosen the crystals.

Blackberry Ice

5 cups blackberries
1/2 cup water
3/4 cup honey
2 tablespoons lemon juice
Pinch of salt

Add the blackberries and water to a blender or bowl of a food processor. Process the berries for about 30 seconds or until well blended. Strain the berry mixture through a medium mesh strainer, pressing the liquid through with a rubber spatula in 3 or 4 batches. Stir the honey, lemon juice and pinch of salt into the strained berry puree and transfer it to a 9x 13-inch pan. Place it  in the freezer for 1 hour, Remove the pan from the freezer and scrape the frozen edges into the center of the pan with a fork. Return the pan to the freezer for another hour. Scrape the ice crystals again to the center and return to the freezer for at least another hour or overnight. Scoop the ice into small chilled bowls and serve immediately. Can be made a day ahead. If the mixture becomes too firm to scoop, just scrape it again with the tines of a fork to loosen the crystals.


June 16, 2010

Strawberry Shortcakes with Buttermilk Ice Cream

Filed under: Desserts — by Carla

straw-shortcakes_12725 

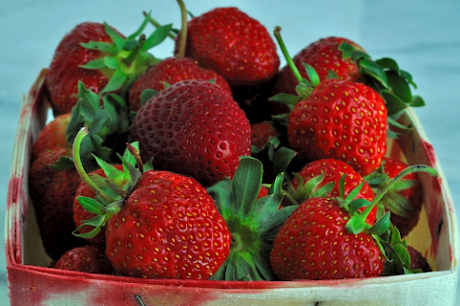
There are some dishes that actually scream, “I’m in season. Quick, eat me right now”. In July, it’s crunchy, creamy, corn on the cob. In August it’s juice dripping down your chin tomatoes freshly plucked from the garden. And in June, tah dah…it’s strawberries. Not strawberries as you know them from the rest of the year, but the real deal, locally grown, sweetened by the same sun that shines on you strawberries. Strawberries so good, they make you forget winter. Magic strawberries, indeed.

We have about four weeks of good strawberry eating and though I have been known to make a jar or two of strawberry jam once in a while, I’m mostly a fan of eating them naked, just as they are. But when family arrives for sunday dinners, it’s time to make that summertime dish of dreams and memories, strawberry shortcake.

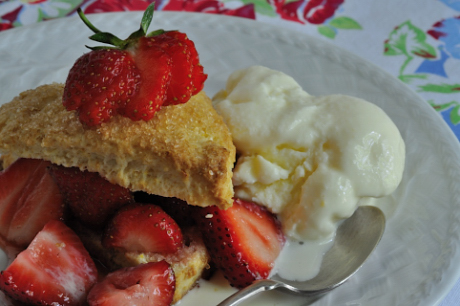
 Because shortcake as usual is a little bland, I can’t resist perking it up with a little orange zest. But keep in mind shortcake’s major function, after all, is to act as a sponge. Though it may seem like sacrilege to douse these perfect berries with sugar, I love the juicy sauce that ensues. It softens the berries a bit and enables the shortcake to perform its ordained job of sopping up all the sweet/red juice. To make matters even more delicious, I pair the shortcake and berries with a scoop or two of buttermilk ice cream. Even if you don’t really like to drink buttermilk, you can’t let that minor detail stop you from trying it. A frozen custard, really, this ice cream is rich with egg yolks and heavy cream. The perfect icy, creamy, tangy accompaniment, buttermilk ice cream just might turn out be the strawberry’s new best friend.

So, don’t hesitate to create your own summer memory on a plate. Whether you buy them at a farmer’s market or pick them yourself, search out your own magic berries in the next few weeks and make this delicious dessert for family, friends or just for you and you alone. Quick. Eat strawberries right now.

Kitchen Counter Point: There are two important points in making the best shortcake. 1) It’s important to start with cold butter. That way, some of the little nubs of butter remain in the dough and help to puff it when they steam and melt in the oven. If you use warm butter it will be completely rubbed into the dough and the shortcakes will be heavy like  hockey pucks. 2) The next step is to add the buttermilk and just mix until it comes together. You don’t want to work it too much at this point as the gluten in the flour will become activated and become tough. Toss with a fork or your hands until the dough just comes together, then pat it out on a floured surface and cut into triangles. It’s so easy.

straw-shortcakes_1262

2 pints strawberries
1/3 cup sugar
2 teaspoons lemon juice
Pinch salt

Shortcakes
1 1/2 cups unbleached all purpose flour
1/4 cup sugar
2 teaspoons baking powder
1/2 teaspoon salt
6 tablespoons unsalted butter, log quartered and diced into small squares
Zest of 1 orange
1/2 cup buttermilk plus 1 tablespoon, divided
2 tablespoons coarse sugar like Sugar in the Raw or granulated sugar

Buttermilk Ice Cream, recipe follows

Preheat oven to 350ºF

Wash the strawberries and hull and slice them. Add them to a medium bowl and combine with the 1/3 cup sugar and lemon juice. Stir and set the strawberries in the fridge for at least 1 hour and up to 3 hours so that the sugar has a chance to pull the juices from the strawberries and make a nice juicy sauce.

Add the flour, sugar, baking powder and salt in a medium bowl and stir with a whisk or fork to combine. Add the butter and orange zest and squish together with the tips of your fingers until the mixture is crumbly. Add the 1/2 cup buttermilk and quickly combine with a fork until it forms a mass. Turn the dough out onto a floured work surface and pat into a circle about 1-inch thick. Cut crosswise into 6 triangles and transfer to a parchment lined baking sheet. Brush the tops with the remaining tablespoon of buttermilk and sprinkle the coarse sugar over the tops. Bake in the preheated oven for 20 minutes or until golden. Transfer to a wire rack and cool completely.

To serve, slice the shortbreads horizontally and place the bottoms on a small plate. Spoon the strawberries and juice over the shortcake and replace the top. Serve with buttermilk ice cream and swoon.

Buttermilk Ice Cream

2 cups heavy cream
6 large egg yolks
1 cup sugar
1/4 teaspoon salt
3 cups buttermilk
3 tablespoons lemon juice
Add the cream to a medium saucepan and bring to a simmer over medium-high heat.

While the cream heats, whisk together the yolks, sugar and salt together in a medium bowl. When the cream is hot, slowly pour it into the yolks while beating them with a whisk. Transfer the cream/egg mixture back to the pan and cook over medium heat until thickened slightly (don’t boil) about 3 minutes. Pour the custard into a large, clean, heat-proof bowl and cool to room temperature. Whisk in the buttermilk and lemon juice and chill the ice cream base until very cold (see tip). Freeze in an ice cream maker according to manufacturer’s directions. Most will tell you to transfer the ice cream to a container and freeze it until it is firm, at least 4 hours, but I never have time for that. Besides, I like it soft, smooth and creamy and serve it straight from the ice cream maker bowl. Serve with strawberry short cakes or anything else that you want to be out of this world delicious.

Tip: I usually make ice cream the day I’m going to use it, so I’ve come up with a way to chill the base fast. Pour it into a 9x 13 metal pan and place in the freezer. Check every 30 minutes or so and give it a stir. Remove it before it begins to set up and process it in the ice cream maker. If it begins to set up and freeze, let it warm up a bit in the fridge. If you add it to the ice cream maker too cold, it can freeze up too fast on the outside edges and jam the machine.

February 22, 2010

Caramel Oranges with Cardamom

Filed under: Desserts — by Carla

caramel-oranges_092


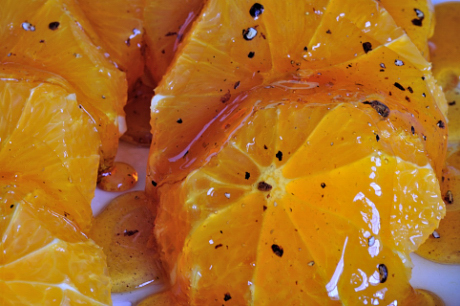
This morning the view outside my kitchen window resembled a black and white photograph…white snow, black tree silhouettes and a gray sky. Though that isn’t always such a bad thing, today I felt the need to inject a little color into my life. I was in the mood to trade in black turtlenecks, woolly socks and downcast skies for a pair of flip flops, shorts and a poolside lounge chair but, finances and schedules ruled out a quick trip to the tropics.  Thinking I could bump out of my funk with a cooking project, I checked out the contents of my refrigerator when lo and behold,  nestled among the endive, radicchio and celery lay four naval oranges.Just looking at those bright orange balls raised my spirits. It’s citrus season and nothing beats oranges for that  tart, yet sweet at the same time taste. In a flash, I cooked up a batch of caramel oranges, a super easy dessert- breakfast-snack that always brightens my outlook. I like this dish best when it has been in the refrigerator for a few hours. The brittle caramel melts and makes an orangey, caramelly sauce that you’ll want to lick off the plate. This time, for a little exotic zip, I added a pinch of ground cardamom seeds to the syrup right before drizzling. I really liked how it perfumed the caramel with a hint of eastern pizazz. So even though the sun hasn’t graced us with its presence for a few weeks, today I have the taste of sunshine in my mouth. I just might make it to March after all.


cardamom_0911

Kitchen Counter Point: Cardamom is a warm, pungent spice used in sweet and savory Indian curries and some Scandinavian breads. You will find it in a few different forms at the grocery store. It can be bought as 1) pods, 2) whole seeds, and 3) ground. I like to buy it as whole seeds and crush or grind them just before using. That way the flavor is at its peak. Though you can buy the pods and crush them to free the seeds, it is a bit of a bother  to separate the seeds from the crumbled pod.

caramel-oranges_0901

Serves 4

4 naval oranges
1/2 cup sugar
3 tablespoons water
1/4 teaspoon cardamom seeds, ground in a mortar and pestle or a pinch of ground

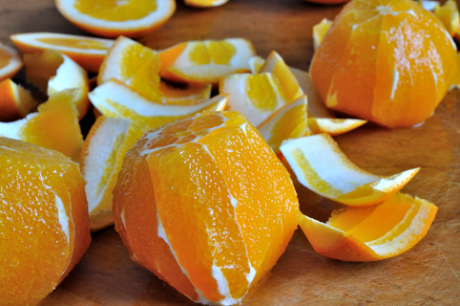
Peel the oranges by cutting off the top and bottom to make them flat and then slicing around the circumference of the orange with a sharp knife, cutting away the peel and white pith. Then cut the orange crosswise into about 6 sections and arrange them on a heat-proof platter.

Add the sugar and water to a saucepan and swirl over low heat until the sugar has dissolved. Do not stir. Turn up the heat to high and bring to a boil. Once the syrup is boiling, cook it for about 4 minutes or until the syrup has browned to a rich caramel color. It will be very bubbly. Watch it closely as there is less than  a minute between sublime and burned. Add the cardamom seeds and swirl them to combine and drizzle the syrup over the oranges. Serve immediately or let sit in the refrigerator for a few hours so that the oranges macerate and make a caramel syrup.

December 23, 2009

Linzer Cookies with Raspberry Jam

Filed under: Cookies, Desserts — by Carla

 linzer_073


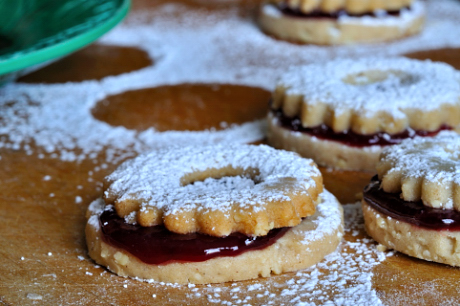
Along with the iced sugar cookies, rugulach, gingerbread and snowballs, these Bavarian treats yell “Look at me” on the cookie tray. The warm spices of cinnamon and clove pop with flavor, not to mention the fruity raspberry jam’s tart bite. They take a little time to make, but that’s part of what makes them special. Everyone who eats one knows that they are biting into something that was baked with love. I usually place them around the edges of the cookie tray because they really stand out with that snowy covering of powdered sugar. The dough freezes really well, so make as many as you want and then tuck the remaining dough away for another time. Not just for Christmas, they’d be pretty fabulous with a cup of coffee in January or February as well. Happy Holidays!


linzer-fixed_074

 Kitchen Counter Point: Rolling the dough between sheets of plastic means that you can re-roll the scraps over and over again. Rolling the dough in flour toughens it so you usually can’t re-roll scraps more than 1 or 2 times. It also helps to make cleaner cuts with no sticking if you dunk the cutter into flour once in a while. I like to use a decorative round cutter for the tops. It just makes them look a little more special. Just bake them separately from the solid rounds because they cook a little faster. To make the sugar topping look its best, use a strainer filled with powdered sugar to dust the tops of the cookies.

linzer-fixed_075

Makes about 3 dozen cookies

2 cups unbleached all purpose flour
1/2 teaspoon cinnamon
1/4 teaspoon cloves
1/4 teaspoon salt
1 cup powdered sugar
1 cup unsalted butter, softened
1 large egg
1 cup finely ground almonds
1/2 cup seedless raspberry jam
Additional powdered sugar

In a small bowl, combine the flour, cinnamon, cloves and salt. Wisk to blend.

Beat the powdered sugar and butter until light and fluffy. Beat in the egg and add the dry ingredients by the cupful. Stir in the almonds.

Divide the dough in half and roll it out to about 1/8-inch thickness between 2 sheets of plastic wrap. Chill on a cookie sheet until firm, about 20 minutes. Cut out rounds with a 2-inch round cookie cutter and cut the center out of half the rounds with a 3/4-inch round cutter. Re-roll the scraps and cut out more in the same manner.

Preheat oven to 350ºF

Bake on parchment lined sheet pans for 10 to 12 minutes or until lightly golden. Cool on wire racks and spread the rounds with raspberry jam. Top with a ring and sprinkle powdered sugar over all.

October 15, 2009

Southern Comfort Sour Cream Chocolate Cake

Filed under: Desserts — by Carla

 sc-cake-3_019

When contemplating dessert for a family celebration, chocolate, much like cream, rises to the top. Of course it makes the chocoholics happy and it’s a good idea to give them a  fix every now and then, but even non-dessert lovers can become enthused at the sight of a majestic, rich with butter and sour cream chocolate cake. So, for my husband Rick’s birthday last week, I decided to go for chocolate and adapt an already chocolatey rich cake recipe with enough chocolate to make even the most ardent dessert lovers cry uncle. To make matters even more interesting, I topped off the 8 ounces of unsweetened chocolate in this cake with a touch of “likker” in the form of Southern Comfort which makes this chocolate tower of a cake even more luscious.

The cake was a hit with an added bonus. The intense flames from the 55 burning candles melted the bittersweet chocolate garnish a bit…which wasn’t a bad thing at all.

Kitchen Counter Point: The next time you ice a cake, borrow a technique from the pros that will keep your cake stand clean and neat. Cut triangles of parchment paper and slide the long side of each piece under the bottom cake layer so that the cake stand is covered. Use an offset spatula to ice the cake. It is ever so much easier to use than a butter knife and you will love, love, love your new tool. Turn out a large blob of icing on top of the cake and smooth it to the edges, leaving a thick layer of icing extending over the perimeter of the cake. Smooth the excess icing down the sides adding more icing to cover. When finished, pull the parchment away from the cake, et voila, a picture perfect cake.

Makes 1 double layer 9-inch cake serving 12

2 cups unbleached all-purpose flour
1/4 cup cocoa powder
1 1/4 teaspoons baking powder
1 teaspoon salt
1/2 teaspoon baking soda
4 ounces unsweetened chocolate
1/4 cup unsalted butter
2 cups sugar
1 cup sour cream
2 eggs, room temperature
3/4 cup milk
2 tablespoons Southern Comfort
2 teaspoons vanilla

4 ounces unsweetened chocolate
1/2 cup unsalted butter
5 cups confectioners sugar
1/2 cup sour cream
1 tablespoon Southern Comfort
2 teaspoons vanilla
1/4 teaspoon salt
One 4-ounce bar bittersweet chocolate, chopped for garnish

Preheat oven to 350ºF

Two 9-inch round metal cake pans greased and lined with greased and floured parchment paper

In a large bowl combine the flour, cocoa powder, baking powder, salt and baking soda and whisk until combined.

In a medium heat proof bowl set over simmering water, melt the chocolate and butter, stirring until completely melted. Remove the bowl from the pan and set aside to cool.

In a mixer bowl, combine the sugar and sour cream and beat on medium until combined. Add the eggs one at a time and mix until blended. Add the milk, Southern Comfort, vanilla and melted chocolate mixture and blend.

Add the dry ingredients by the cupful and mix on low speed until incorporated. Turn the mixer to medium speed and mix for 2 minutes or until the batter is smooth.

Divide the batter among the prepared pans and smooth the tops. Bake in the middle of the preheated oven for about 35 to 40 minutes, or until a tester inserted into the center comes out clean and the edges of the cake begin to pull away from the sides of the pan. Let cool on racks for about 5 minutes, then invert onto racks, peel off paper and let cool completely.

To prepare the frosting, melt the chocolate and butter in a large heatproof bowl over simmering water, stirring until melted. Remove from the heat and add the confectioners sugar, sour cream, Southern Comfort, vanilla and salt. Beat on medium speed until glossy, adding more confectioner’s sugar if too thin or milk if too thick a spreading consistency.

To assemble, place one cake layer, flat side up on a cake stand and spread approximately 1 cup of the frosting over the top. Add the remaining cake layer, flat side up, and spread the remaining frosting over the top and sides of the cake. Sprinkle the chocolate over the top. The cake keeps covered at room temperature for 2 days.

August 13, 2009

Nectarine and Berry Crisp

Filed under: Desserts — by Carla

berry-crisp-2_0022

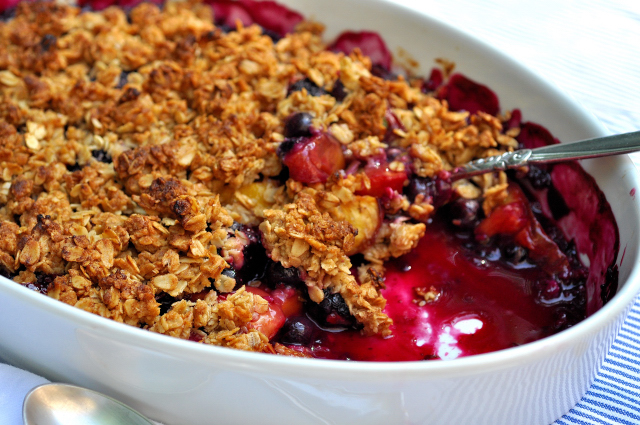
I must admit that I have a bit of an addiction for fruity, berry based desserts. It comes as no surprise to my family, who’ve been noshing on crisps of this sort all summer long. Desserts of this type are even better when you can buy locally grown fruit which has had the chance to ripen on the tree or bush, soaking up all that sun kissed summer has to offer.

This is my favorite rendition of the classic crisp. I also have an affliction (I mean affection) for plums, peaches and apricots, though you must peel the furrier fruits before tossing with the berries. My trademark is the addition of the lemon verbena, which I always plant in the spring so that I have it on hand throughout the summer and fall. It is one of my favorite herbs and once you try it, I hope it will become one of yours as well. Not to worry if you can’t find it at this point, just be sure to plant it next year!

Kitchen Counter Point: Let’s talk about lemon verbena for a moment. It grows with no encouragement whatsoever along with the basil, thyme and chives, so it is very easy to keep up with. The leaves are very fragrant in a lemony floral kind of way. Other uses for it are to 1) add to a food processor with granulated sugar and process to make lemon verbena sugar which is great on shortbread or sugar cookies, 2) minced and added to blueberry muffins, pound cake or pancakes, 3) instead of basil or cilantro, try adding lemon verbena to salsas and summer compotes. These are just a few of the uses, not to mention, just picking a few sprigs to add to small bouquets. Their long pointy leaves are pretty and when brushed, give off that heavenly, lemonly smell.

 Serves 8

1 cup brown sugar, divided use
1-1/2 cups regular oats
1/4 cup plus 3 tablespoons all-purpose flour, divided use
6 tablespoons unsalted butter, softened
1/2 teaspoon cinnamon
1/8 teaspoon salt
4 nectarines, pitted and each cut into about 8 sections
8 ounces blueberries
6 ounces blackberries
6 ounces raspberries
2 tablespoons chopped lemon verbena, optional
Zest and juice of 1/2 lemon
Ice cream or whipped cream as an accompaniment if desired

Preheat oven to 400ºF.

In a medium bowl, combine the 1/2 cup brown sugar, oats, 1/4 cup flour, butter, cinnamon and salt. Mix together with your fingers or a fork until well blended

In a large bowl combine the fruit and remaining 1/2 cup brown sugar (less if your fruit is at its peak of ripeness), 3 tablespoons flour, lemon verbena if using, lemon zest and juice. Toss gently to combine. Transfer to a buttered 2 quart baking dish. Sprinkle the topping evenly over the fruit. Bake in the preheated oven for 40 minutes or until the fruit is bubbly and the topping is crisp. Remove from the oven and cool for 15 minutes before serving warm with ice cream or whipped cream.

March 17, 2009

Tarte Tatin

Filed under: Desserts — by Carla

tarte-tatin

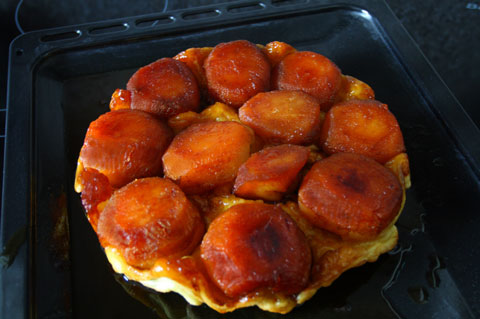
Today’s culinary history lesson (and listen up, there will be a quiz): Invented by the demoiselles Tatin over 100 years ago in their hotel-restaurant in the Lamotte Beuvron region near the Loire River, this rich upside down apple tart is a lesson in simplicity. As with many simple dishes, the quality of ingredients is tres importante. Since it isn’t possible to find French apples at the local Stop and Shop, we’ve had to experiment with local varieties. We find the Granny Smiths to be the best apples for Tarte Tatin since they keep their shape and their tartness is a nice counterpoint to the sweet buttery caramel.

Once baked, the caramelized apples are flipped so that the crispy crust is on the bottom revealing the beautiful glazed fruit. Constructed of nothing more than apples, butter and sugar in a pastry-topped skillet, this tour de force is sure to become one of your family’s favorite desserts.

Serves 10

For the pastry
1-1/2 cups unbleached all purpose flour
1/2 teaspoon salt
1/2 cup (1 stick) plus 2 tablespoons cold unsalted butter, cut into 1/2-inch cubes
1/3 cup ice water
Additional flour for rolling

16 Granny Smith apples (12 if they are large)
1/2 cup (1 stick) plus 2 tablespoons unsalted butter, softened
1-1/2 cups granulated sugar
Pinch salt

Crème fraîche or crème anglaise as garnish

To make the pastry in a stand mixer: Combine the flour, salt and butter in the bowl of a stand mixer. Using the paddle attachment, mix for 30 seconds on low speed. Turn the mixer to medium and mix until the butter is cut into the flour and only small lumps of butter remain, about 1 minute. Quickly add the ice water and when the dough begins to come together stop the machine. Remove it from the bowl and compress it into a disk with your hands. Wrap it in plastic and refrigerate for about 30 minutes to chill for easier rolling.

To make the pastry in a food processor: Combine the flour, salt and butter in the work bowl of a food processor. Pulse the mixture 10 times until the butter is cut into the flour and only small lumps of butter remain. Quickly pulse in the ice water through the feed tube (about 4 pulses) and stop the machine. The dough will not have come together. Dump the pastry onto a counter top and using the heel of your hand, smear the dough out and away from you until it forms a cohesive mass. (A pastry scraper, dough knife or bench knife makes it easy to scrape it all together.) Shape and compress the dough into a disk, wrap it in plastic and refrigerate for at least 30 minutes to chill for easier rolling.

While the dough is chilling, cut a thin slice from the bottom of each apple so that they will sit straight in the pan. Halve the apples lengthwise then core and peel them.

In a 10-or 11-inch skillet (about 3 qt.) with straight sides add the butter and heat over medium-high heat until melted. Sprinkle the sugar and salt over the butter and cook, stirring occasionally until the sugar begins to brown, about 4 minutes. Lower the heat and cook for 3 minutes after the sugar begins to brown stirring every now and then to ensure even caramelization. When the mixture becomes a deep golden caramel, remove it from the heat.

Carefully stand the apples flat side down around the outside of the pan (cut sides facing in) then fill in the center with the remaining apples so that the apples are as snug as possible. It may be necessary to cut some of the apples in half (quarters) so that they fit. Return the pan to medium-low heat and cook for about 3 minutes. The apples will begin to give off some of their liquid, thinning the hard caramel. Using a turkey baster, baste the apples with the caramel. It will be thick at first, but will thin as the apples cook. Baste for about 10 minutes and add leftover apples cut into quarters to fill in spaces that open up as the apples soften.. Remove the pan from the heat.

Preheat an oven to 400 degrees F.

To roll out the pastry: Lightly flour a work surface with about 1 tablespoon of flour. Place the unwrapped disk of dough on top of the flour and dust the top of the disk with an additional tablespoon or so of flour. Roll the dough gently but firmly, picking it up after each roll and rotating it a quarter turn from 12 o’clock to 3 o’clock. This rotation keeps the dough from sticking and also helps to keep a round shape.

Roll the dough to about 14-inches in diameter and trim the round so that it is 2-inches larger than your cooking pan. Fold the dough in half and then into a quarter and transfer it to the skillet placing the folded point in the center of the apples. Quickly open the dough and fold the sides down between the apples and the pan. Cut vent holes in the top and bake on a sheet pan with sides (to catch any drips) in the preheated oven for 25 to 30 minutes or until the pastry is brown and crisp.

Remove from the oven and let cool for at least 20 minutes before carefully inverting onto a large serving platter. Cut the tart at the table and serve warm with crème fraîche or crème anglaise.

Make-ahead: If you make the tart earlier in the day, it should be warmed in a 350 degree F. oven for about 20 minutes before serving. Turn the tart out right before service onto a serving platter.

Note: French apple pie or Tarte Tatin is so revered that there is actually a brotherhood founded to protect the dish from adaptations and promote its consumption. La Confrerie des Lichonneux de Tarte Tatin is dedicated to protect the original dish from being perverted by persons who want to put a dollop of ice cream on top of it. Their website is www.tarte-tatin.com/.

Tip: Though a simple dessert, this French apple pie is not uncomplicated. Browning the sugar and butter to the perfect color caramel is key. If you are using a dark skillet, spoon some of the caramel as it is cooking to get an idea of how dark it is. Too dark and your tart will be bitter. Too light and it will lack depth and richness.

Tip: The correct size skillet is important. We think a 10- or 11-inch skillet with straight sides works best. If you use a skillet with sloping sides (like a fry pan) the tart may not hold together when unmolded and look a bit messy on the sides but it will still taste great. Traditionally tarte tatin was made in cast iron pans. If you find an old seasoned cast iron pan with straight sides, by all means use it. It will cook your tarte tatin to perfection. Le Creuset also makes special tarte tatin pans that can be found in some cookware stores.

Plum Upside-Down Cake

Filed under: Desserts — by Carla

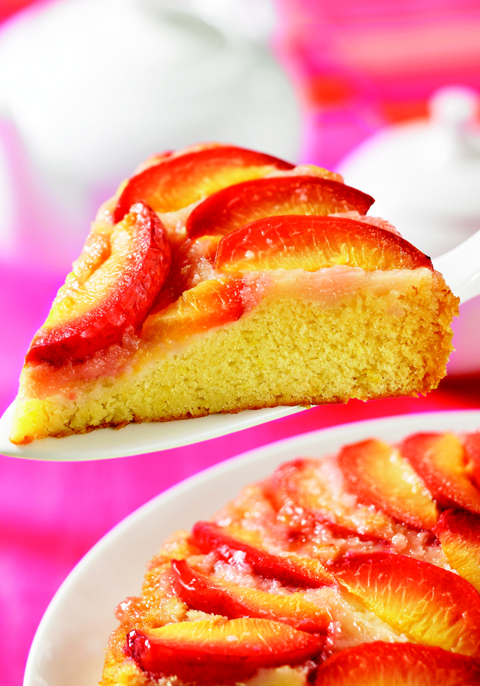
Plum Upside-Down Cake

Those of us of a certain age (and you know who you are) remember the pineapple upside down cakes which appeared so often at mid-century get togethers. Topped with canned pineapple rounds and the ubiquitous maraschino cherry in the center, these cakes were colorful and somewhat visually appealing, and most of us hardly noticed the effects of the red dye #5.

Our fresh 21st century version of the upside down cake features plums, whose pink hue and sweet tart flavor makes this buttery, light cake a favorite for breakfast, dessert or that 3 o’clock pick me up with coffee. We usually make 2 cakes at a time because we know from experience that one cake isn’t enough to feed our hungry hoards. Look for plums that are somewhat firm and yield slightly to pressure. They will soften during the cooking process to tender tart sweetness.

Makes One 9-inch Cake

6 tablespoons unsalted butter, softened
1/2 cup granulated sugar
1 large egg
Grated zest of 1 lemon
1 cup unbleached all-purpose flour
1/2 teaspoon baking powder
1/2 teaspoon baking soda
1/4 teaspoon salt
1/3 cup buttermilk
1 teaspoon vanilla

2 tablespoons unsalted butter
1/4 cup granulated sugar
3 plums, stoned and each cut into 12 slices
2 teaspoons lemon juice
Sweetened Whipped Cream (page xx) or ice cream as an accompaniment

Preheat an oven to 350 degrees F.

Cream the butter in the mixer bowl on medium speed. Add the sugar and continue to beat for another 3 minutes. Add the egg and grated lemon zest and beat for 1 minute longer.

Mix the flour, baking powder, baking soda and salt together in another bowl and add the dry ingredients alternately with the buttermilk on slow, beating until the batter is smooth. Mix in the vanilla.

In a 9-inch cake pan melt the 2 tablespoons butter over medium heat. Add the 1/4-cup sugar and cook, stirring for about 2 minutes. Carefully remove the pan from the heat and lay down the plum slices in a decorative pattern working from the center to the outside, overlapping them slightly. Sprinkle with the lemon juice. Return the pan to the heat and cook undisturbed for another 4 minutes. Look for the juices to bubble up and around the plums.

Remove the pan from the heat and carefully and evenly add the batter to the pan covering the fruit. Try not to disturb the placement of the fruit slices. Bake the cake in the middle of the preheated oven for 25 minutes or until a cake tester inserted in the middle comes out clean. Let the cake cool in the pan for 10 minutes before inverting it onto a serving plate. Serve the cake warm or room temperature with the Sweetened Whipped Cream or ice cream as desired.

Older Posts »